Showing posts with label Breakfast. Show all posts

Monday, October 17, 2011

Ham and Egg Scramble

UPDATE:  Deli meat is not part of the anti-Candida diet.  Dayna, one of my readers, kindly brought this to my attention shortly after I posted this "recipe."  I did a little reading and found a comprehensive list of diet "do's and don'ts" on Candida Control Diet. So, please disregard all my references to deli meat below and use a meat such as chicken which has been baked or broiled. 

Ok, this is kind of a no brainer "recipe" but I thought I'd share anyway. I eat TONS of eggs on my anit-Candida diet because they are quick and easy to prepare, which is a rarity when adhering to this diet.  (Does anyone else spend way more time in the kitchen than they would prefer?) Last week, I decided to spice up my daily lunch routine of scrambled eggs.  Whole Foods ran a special on their ham deli meat chicken, so I scooped some up and got to work.

First, saute chopped onions in olive oil until they are soft. 


Then, finely chop the lunchmeat chicken (yes, I know it looks like ham lunchmeat, but it should be chicken) ...


 ...and toss it in with the onions to warm up.


Season your eggs with salt, pepper and some paprika and scramble.


Cook, plate and enjoy (and savor the fact that you prepared a meal in less than 5 minutes!).  

Monday, July 25, 2011

Candida Friendly Breakfast Casserole Recipe!!

My husband grew up in the South an ADORES breakfast casseroles...you know, the ones full of bread, Bisquick and all that starchy, yeasty goodness.  I scoured the internet, unable to find any recipes void of breads, baking mixes and tons of cheese.  Can you say frustrating?!?!?! I fnally discovered a Cheesy Eggy Casserole recipe in my Taste Life! Organic Recipes cookbook which I modified to fit in with my anti-Candida diet.  May I just be honest for a moment and say, "It's fabulous!!"  Here's what ya do:

Breakfast Casserole
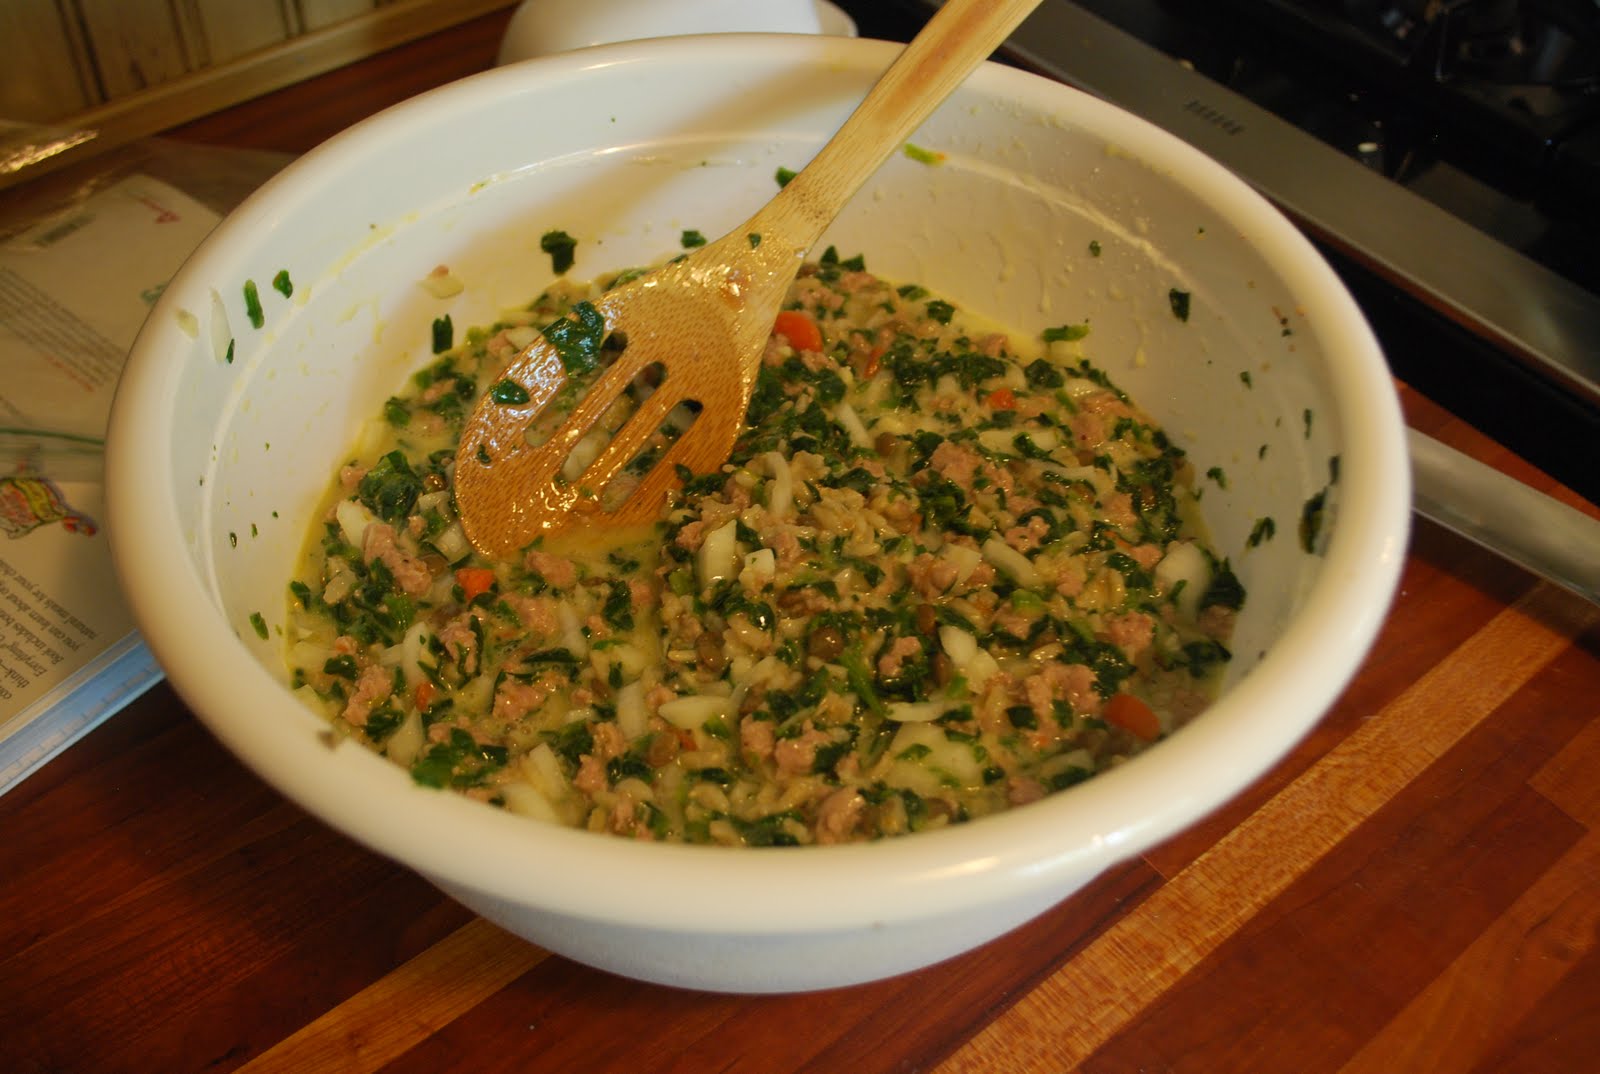
  • 1 lb. sausage, browned
  • 1 bag chopped spinach, thawed and drained
  • 1 1/2 cups coconut milk, unsweetened
  • 9-11 eggs, beaten
  • 2 cups cooked rice
I start by getting my rice cooking.  I use brown rice and it takes about 45 minutes to cook. This time, I had leftovers of my Lentils and Brown Rice and tossed that in instead of cooking a new batch of rice. 


Then, brown your sausage, drain and let it start to cool.


Scramble your eggs.
  

Mix all your ingredients together.


Put it all in a 9 x 13 casserole dish and top with a sprinkle of mozzarella cheese**.  Bake at 350 degrees for 45 minutes or until the center of your casserole is no longer jiggly.  Pull it out and enjoy!!


** Now, I know you're thinking, "Cheese?? We can't have cheese!!" However, in her cookbook Healthful Eating, Lynette Hall addresses the subject of cheese.
"Most cheese making is via a process involving bacteria and use of vinegar.  To acidify the milk bacteria is added so the rennet (either an enzyme from a calf's stomach or derived from molds and yeast) will work and aid in the curing.  The only cheeses usually allowed are fresh mozzarella, feta and ricotta.  These are the only cheeses you will see in this cookbook.  Mozzarella uses citrus acid for processing, ricotta uses lemon juice and feta ripens in salt to brine.  As in all other foods, get the freshest you can from an organic source."
I mostly use mozzarella cheese and have not had a reaction to it.  Obviously, if you have a reaction after eating it, omit from this recipe. 

This is a perfect option for a quick, easy breakfast once you have it cooked.  It keeps wonderfully and my entire family loves this casserold (especially my munchkins!!).  Hope you enjoy it, too!!

Thursday, March 31, 2011

Breakthrough Buckwheat Breakfast!!

Ok, maybe breakthrough is a bit of an exaggeration, but I have discovered a new breakfast option I’m excited to share. I found this Creamy Buckwheat Cereal at Whole Foods and thought it would be a great alternative to oatmeal.

I fixed it with butter, cinnamon, nutmeg, Stevia and coconut milk. Sounds delicious, doesn’t it? Well, it really wasn’t and I was disappointed. I let the cereal sit in the cupboard for a week and thought about what else I could do with it. I had my breakthrough this afternoon as I was making Bri’s peanut butter and jelly sandwich. The peanut butter smelled sooo good and I did a bad thing…I cheated on my diet. I ate a whole, heaping spoonful of peanut butter (peanuts are not allowed because they usually have mold on them. Not helpful when on an antifungal diet). So then I did another bad thing…I fixed a bowl of creamy buckwheat cereal and mixed in another heaping spoonful of peanut butter and some Stevia. WOW and YUM!!! It tasted like I was eating a peanut butter cookie. So, I figure if I use cashew or almond butter instead of peanut butter, it will still be super yummy and kosher for the diet. Here's what you need:

  • ¼ cup of Creamy Buckwheat Cereal
  • ¾ cup of coconut milk (unsweetened)
  • 1 large spoonful of cashew/almond butter
  • Sprinkle of Stevia
Mix well and enjoy!

Buckwheat Pancakes

Pancakes + butter + warm maple syrup =heaven! I adore carbs. Upon beginning my Candida diet, I mourned the loss of fluffy pancakes drenched in butter and saturated in real maple syrup. Not only did I miss the taste, I missed the satisfying, filling feeling that came over me after having consumed said pancakes. I was HUNGRY!! Meat and veggies just weren’t cutting it. So, I began researching alternate grains which would still permit me to eat carbs/grains without the side effects of traditional wheat and white flour. Enter buckwheat flour! I don’t remember how I discovered it, but I’m so happy I did. Buckwheat flour is gluten free and is an excellent source of nutrients. It yields pancakes which create a nourishing, filling breakfast. It took me awhile to adjust to the taste and texture, but these have become one of my favorite meals.

Buckwheat Pancakes

  • 2/3 cup buckwheat flour
  • 1/3 cup brown rice flour
  • 1/2 tsp. baking powder
  • 1 egg
  • 1 cup water or coconut milk (unsweetened)
Mix all ingredients together. Add more or less water to batter to reach desired consistency and cook as you would normal pancakes.


I topped these with maple syrup for Bri and she ate 'em up!

Tip: Since these pancakes are dense and don’t absorb toppings like regular pancakes do, I thin out my batter so my pancakes aren’t very thick. I top mine with butter and serve immediately.

**Those with Candida react to foods differently. These recipes are based upon my reactions to food and should be altered to fit your unique dietary needs.